Recently I attended the AT&T Hackathon for Machine to Machine and Internet of Things. Patrick and I didn't come up with a compelling application. Instead, we spent the time creating a tutorial on how to connect an Arduino with an Ethernet or GSM shield to the Internet of Things through 2lemetry's MQTT service. Here is the tutorial as it was written.
MQTT & Arduino Tutorial
Chris Larson, Patrick Ester
AT&T Foundry Hackathon
14 - 15 September, 2013
Chris Larson, Patrick Ester
AT&T Foundry Hackathon
14 - 15 September, 2013
AT&T Foundry Hackathon
14 - 15 September, 2013
The following is a set of directions used to successfully connect an Arduino Uno with Ethernet shield and the Arduino Leonardo with the 3G shield to the 2lemetry MQTT web service. This tutorial will create a skeleton application that can publish and subscribe to messages. You will need to download the requisite libraries, create an MQTT account, insert the appropriate MQTT information into your Arduino sketch, set your MQTT broker, and finally subscribe to the MQTT messages.
Hardware
- Arduino UNO or Arduino Leonardo, Ethernet Shield, 3G/GPRS Shield
Software
- Arduino IDE v. 1.0.5
Libraries
- Pubsub from Knollear
- tlemetry
- timer library v. 1.2
Installation of libraries on Arduino
For use with an Arduino Uno and the Ethernet shield, you will need the PubSubClient library (https://github.com/knolleary/pubsubclient). The Pubsub library from Knolleary is nested in the “PubSubClient” folder. Be sure to copy “PubSubClient” from within the “PubSubClient” folder to the library folder in Arduino. Restart Arduino to initiate the new libraries.
For use with an Arduino Leonardo and the 3G shield, you will need the tlemetry library (https://github.com/attM2Mfoundry/hackathon-09-14-2013/tree/master/Library/tlemetry) and the timer library (https://github.com/JChristensen/Timer) if you don’t already have it. Restart Arduino to initiate the new libraries.
Create MQTT Account
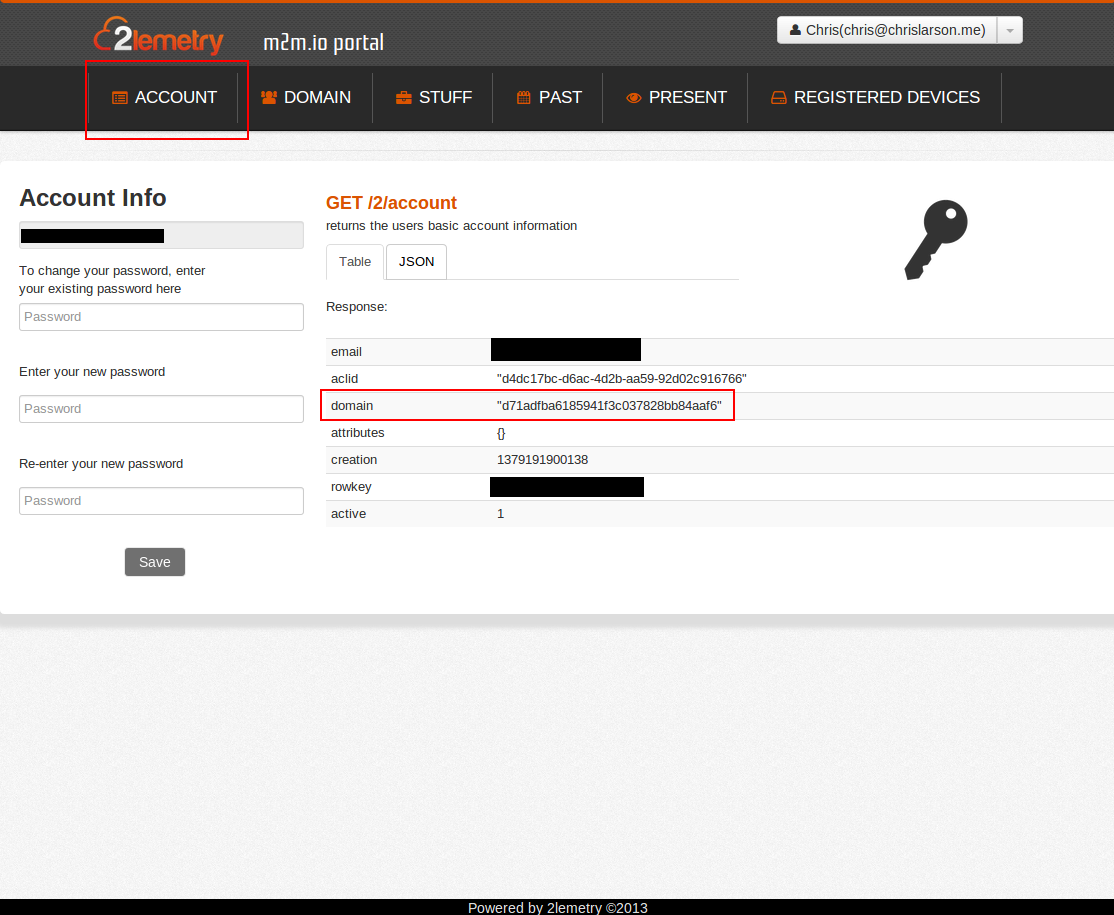
Go to MQTT (app.m2m.io/signup). Enter your name, email, and a password. Click register. You must verify your new account with the provided email address. Once verified, you may log in. Your username is your email. Make note of the domain string, you will need this later. In order to protect your password, use an MD5 generator (http://www.adamek.biz/md5-generator.php) to hash your password. Copy the hashed password. You will paste this into your new sketch.
Adruino Sketch - Arduino Uno and Ethernet Shield
Create a new sketch. Copy the code from the m2mioClient.ino (https://gist.github.com/m2mIO-gister/4288732) and paste into the new Arduino sketch. Look for the section of code below:
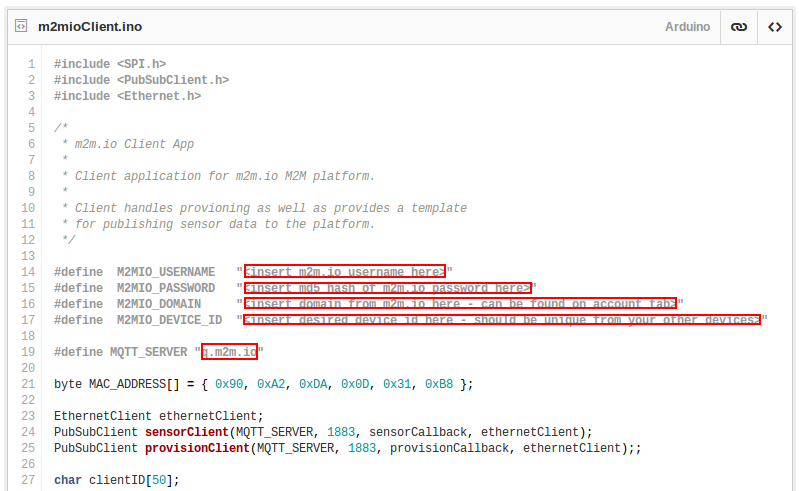
The sketch needs to reflect your account information from MQTT. Be sure to keep the quotation marks, but remove the greater and less than signs. Replace M2MIO_USERNAME with your email used to create the MQTT account. Paste the hashed password into the M2MIO_PASSWORD field. Go back to the MQTT account site, and copy your domain. Paste it into the M2MIO_USERNAME field. M2MIO_DEVICE_ID should be a unique identifier of your choosing (e.g. “Arduino1”). Verify that your MQTT_SERVER is “att-q.m2m.io”. Verify your sketch, and then upload to the Arduino.
Adruino Sketch - Arduino Leonardo and 3G Shield
Create a new sketch. Open file => examples => tlemetry => ATTSensorLoop. Look for the section of code below:

The sketch needs to reflect your account information from MQTT. Be sure to keep the quotation marks, but remove the greater and less than signs. Replace M2MIO_USERNAME with your email used to create the MQTT account. Paste the hashed password into the M2MIO_PASSWORD field. Go back to the MQTT account site, and copy your domain. Paste it into the M2MIO_USERNAME field. M2MIO_DEVICE_ID should be a unique identifier of your choosing (e.g. “Arduino1”). Verify that your MQTT_SERVER is “att-q.m2m.io”. Verify your sketch, and then upload to the Arduino.
MQTT Online Client
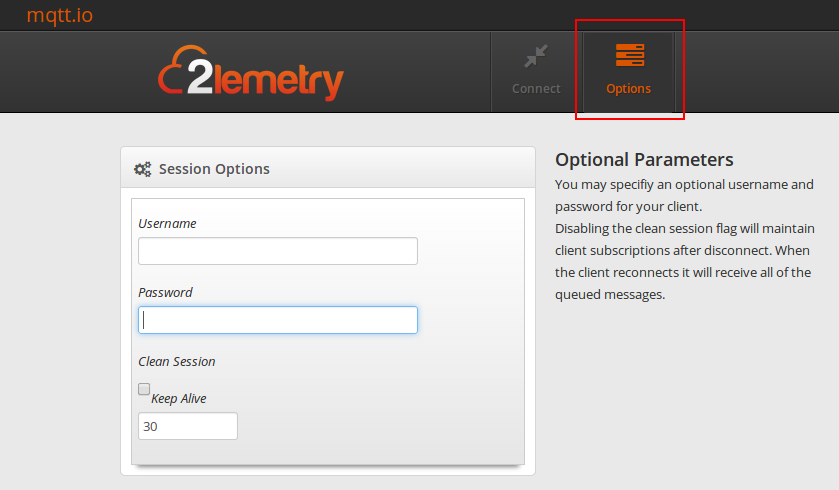
Go to mqtt.io. Click on the Options tab. Enter your username and password (use the unhashed version of your password).
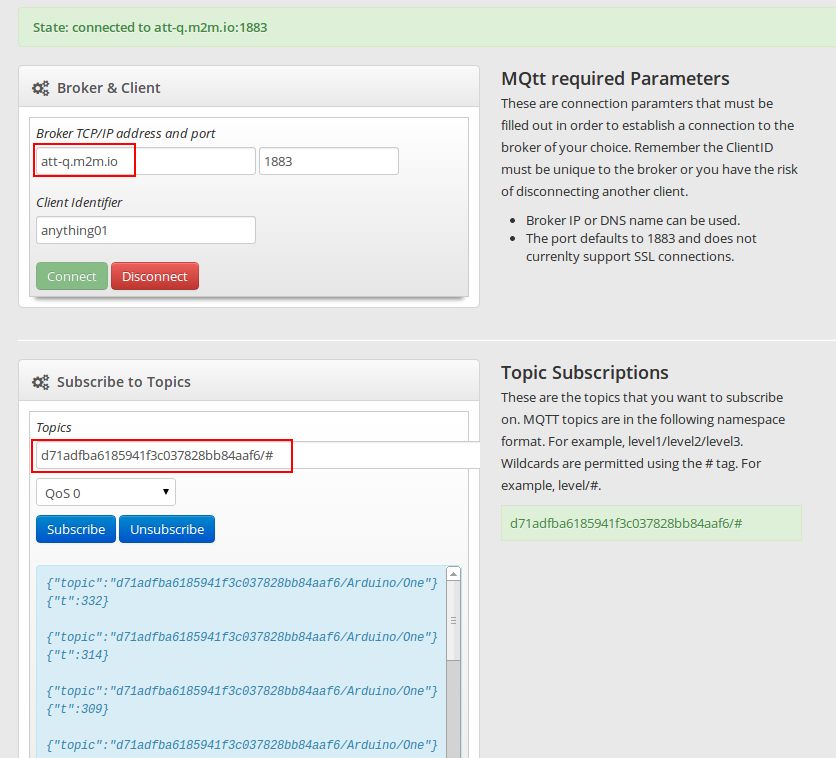
Then click on the Connect tab. The broker client will be “att-q.m2m.io”. The client identifier can be any unique identifier of your choice. Click connect. Look under the “Subscribe to Topics” head. The topic will be your domain followed by “/#”. Then click subscribe. If you do not see any data streaming from the Arduino, you may use the “Topic Subscriptions” to echo test. Under Publish Messages, enter your domain and type a message in the text box below. Click publish. You should see the output in the blue field in the “Subscribe to Topics” section.
Using the APIs
2lemetry offers access to the MQTT messages through a set of HTTP APIs. Visit
http://www.2lemetry.com/api
to see a list of all the possible operations.
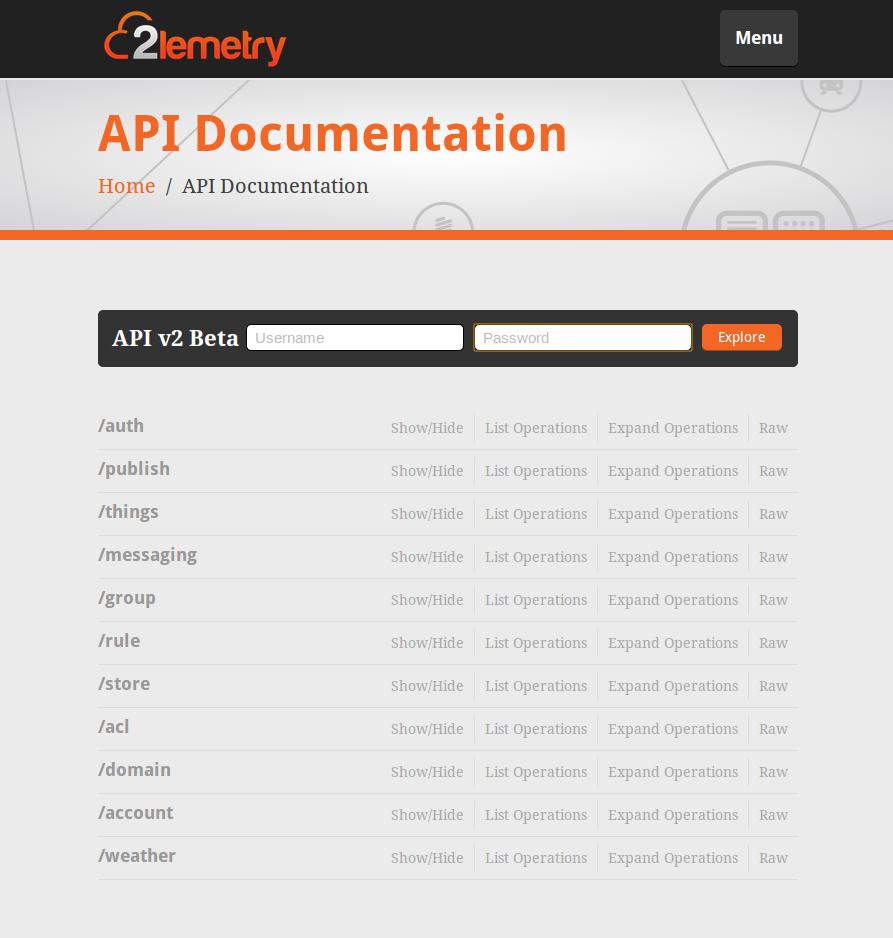
If you have data in your m2m.io account you can enter your m2m.io credentials in the explore bar. Then select an endpoint that you want to query. Click on /things then click GET to see the query options for the GET /things 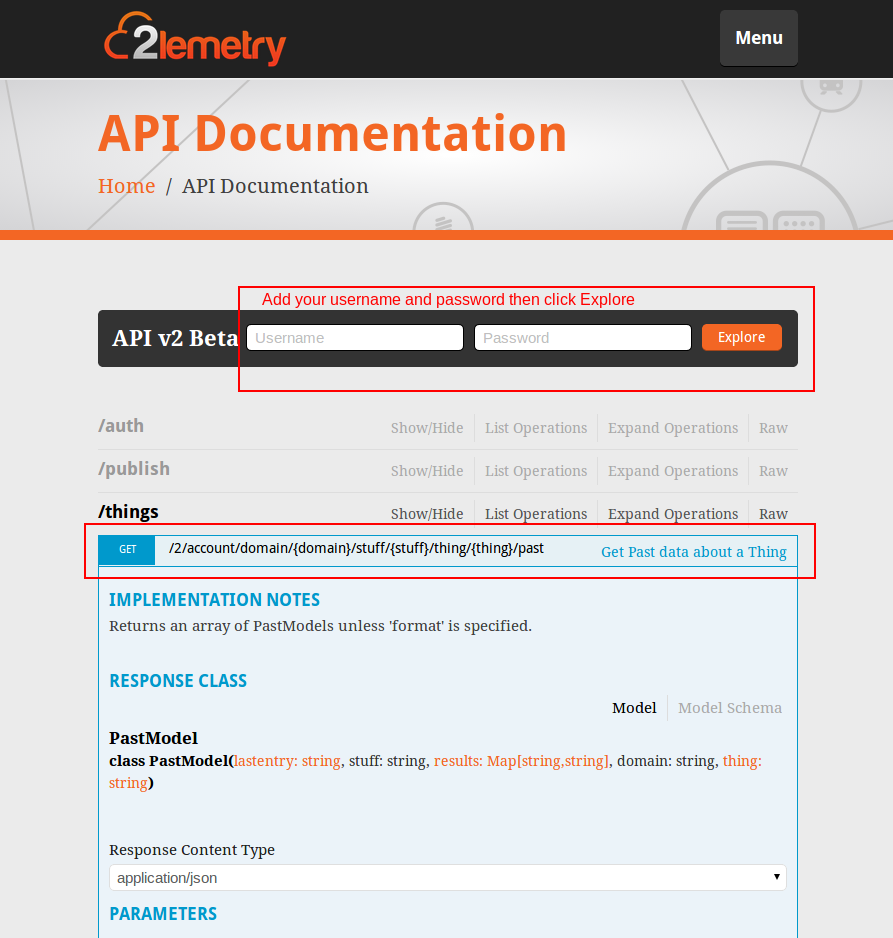
All the API endpoints can be explored from the API Documentation page http://www.2lemetry.com/api
The APIs can be used in an HTML5 application by using the GET/POST/DELETE methods and basic authentication. Here is the fiddle for an example Angularjs and jQuery app http://jsfiddle.net/8fME7/ The important thing is to add the basic authentication header and to allow CORS.
		angular.module('myApp').controller('myCtrl', function ($scope, $http) {
		    $http.defaults.useXDomain = true;
		    delete $http.defaults.headers.common['X-Requested-With'];
		    $scope.sendPost = function() {
		      $http.defaults.headers.common['Authorization'] = 'Basic dGVhbTE5QGF0dC5jb206dGVhbTE5cGFzcw=='
		      $http.post('https://api.m2m.io/2/account/domain/ba4430edaf3b7aceb5df88f28de70c09/stuff/Arduino_Light/thing/device01/publish?topic=ba4430edaf3b7aceb5df88f28de70c09%2FArduino_Light%2Fdevice01%2Fcmd&payload=%7B%22key%22%3A%22' + $scope.key + '%22%2C%22val%22%3A%22' + $scope.val + '%22%7D')
    .success(function(data, status) {
		      $scope.response = data;
		    });
		  };
		});
Chris Larson is a software engineer passionate about the internet of things. He is currently researching better ways for humans to interact with cloud connected devices. During the day he works at National Instruments and in his spare time enjoys blogging about the web and embedded hardware. You can connect with Chris on LinkedIn

Patrick Ester is the lower school computer teacher for the Dallas International School. He is also currently working towards a MA in Emerging Media and Communication from the University of Texas, Dallas.